How to Use a Tire Repair Kit? Step-by-Step Guide (+Video)
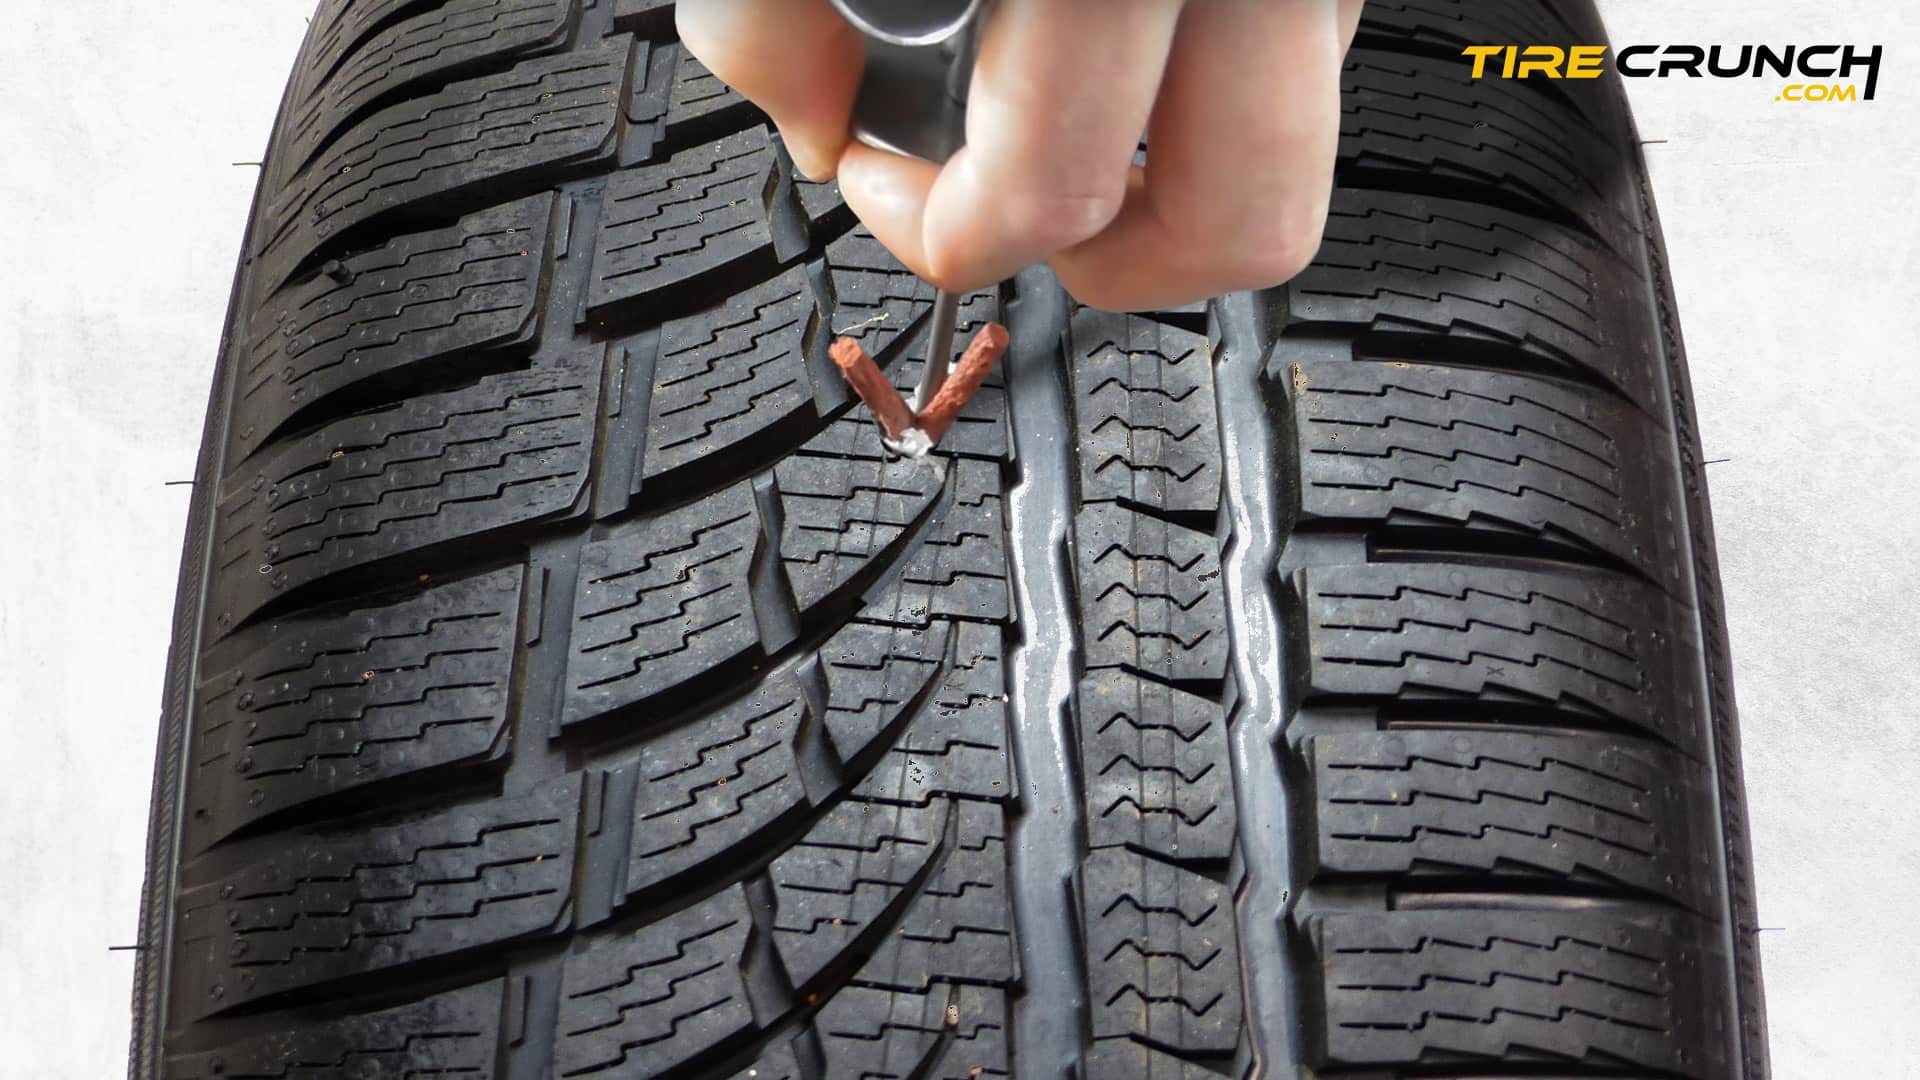
Flat tires always seem to strike at the most inconvenient times, don’t they? Luckily, there’s a solution that can get you back on the road in no time: tire repair kits.
In this blog post, we’ll explore everything you need to know about these handy tools and provide a step-by-step guide on how to use a tire repair kit effectively – your future self will thank you for being prepared when an unexpected puncture threatens to derail your plans!
Summary: How to Use a Tire Repair Kit
What Is A Tire Repair Kit?
A tire repair kit is an essential collection of tools and materials designed to help drivers quickly fix a flat tire without the need for professional assistance.
Instead of being stranded on the side of the road or waiting for roadside help, these kits allow you to take matters into your own hands and get back on your journey in no time.
They are compact, easy to store in your vehicle, and can save both time and money by allowing you to temporarily repair punctures until a more permanent solution can be found.
Types Of Tire Repair Kits
Tire repair kits come in a variety of shapes and sizes, each designed to suit different needs:
Tire Sealant Repair Kit
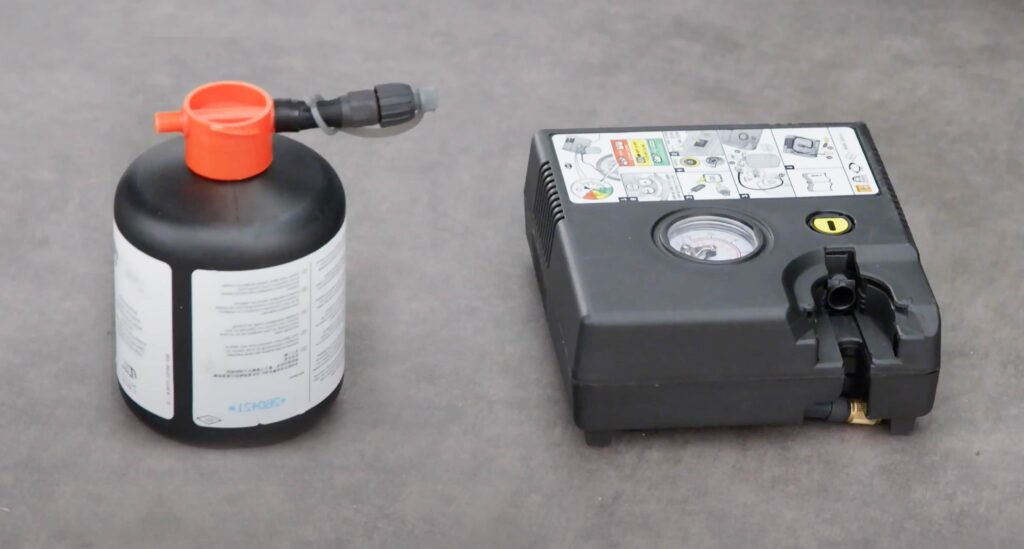
Tire sealant kits provide an easy and effective solution for repairing your vehicle’s tires. Installing the sealant requires few tools or expertise, making it perfect for any DIYer.
The process involves injecting the sealant into the tire through the valve stem, where it will quickly fill holes and prevent air from escaping. With an electric inflator, this job can be completed quickly and easily with minimal mess.
Tire sealant kits provide an ideal solution for dealing with small holes in your tires. For larger holes up to ¼ inch, a tire plug repair kit is required.
Tire Plug Repair Kit
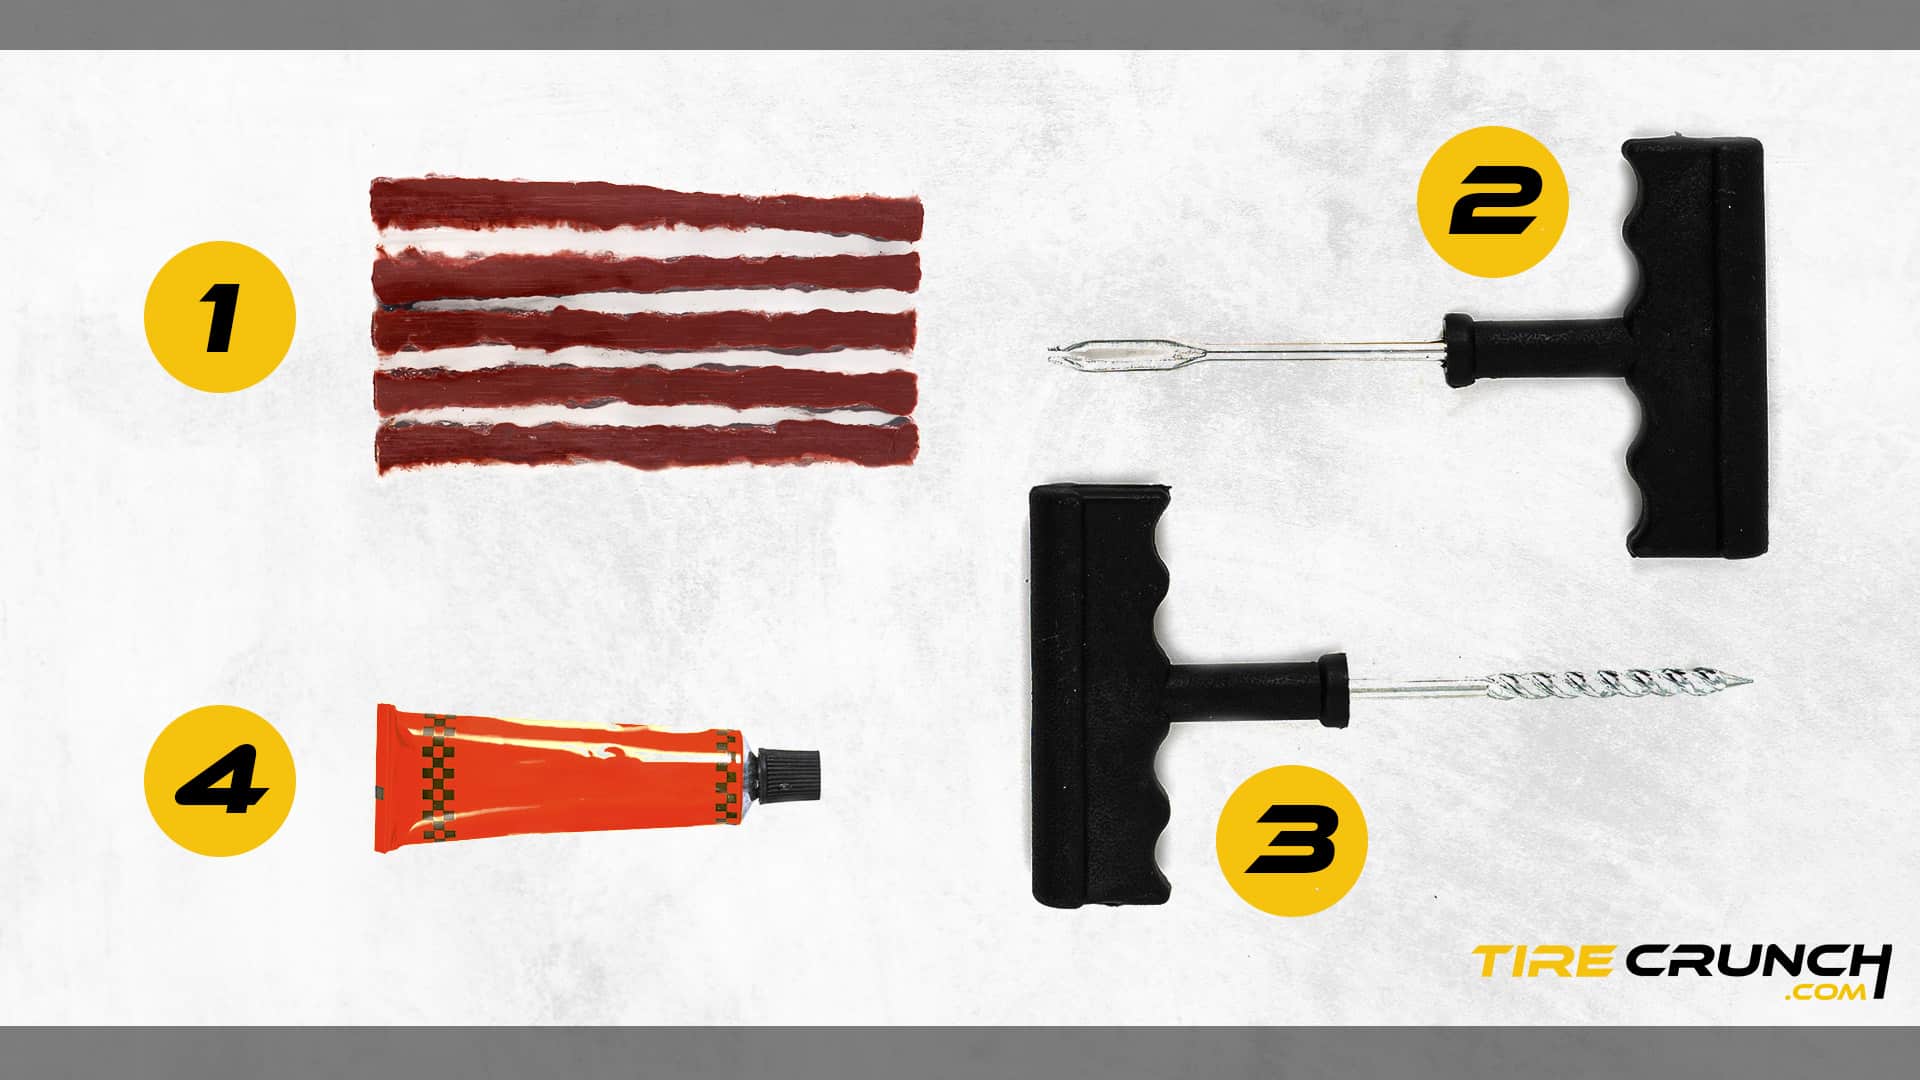
Plug repair kits are the most widely used type of tire repair kits for cars and trucks. If your vehicle didn’t come with a sealant kit, this is the type of kit you should use to help you fix punctures. In this article, we’ll take a look at what these kits contain.
Plug-type kits contain a plug that is typically 4 to 5 inches long and is inserted into the hole in your tire to stop air from leaking out.
Components Of A Tire Repair Kit
Step-by-Step Guide On How To Use A Tire Repair Kit
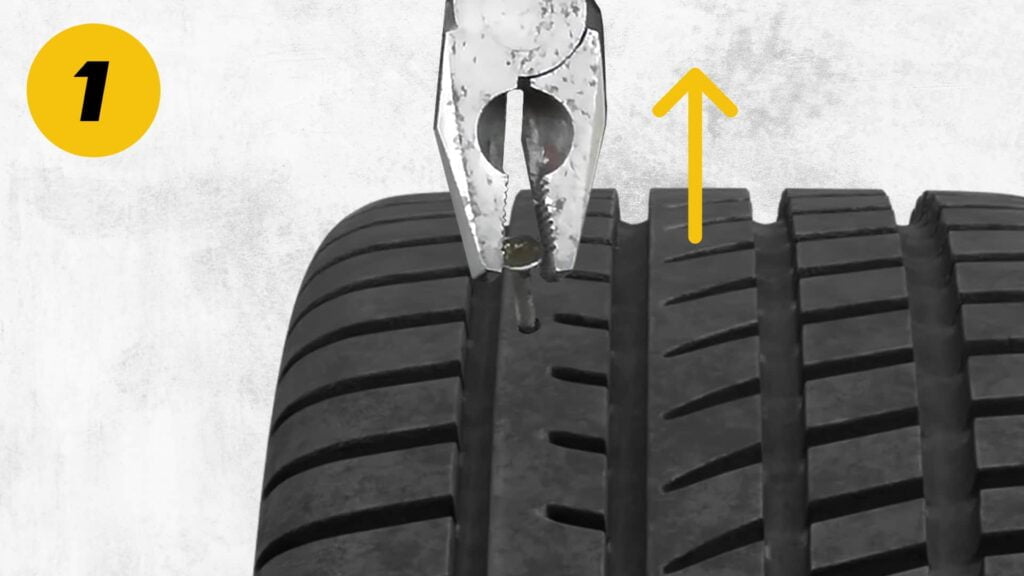
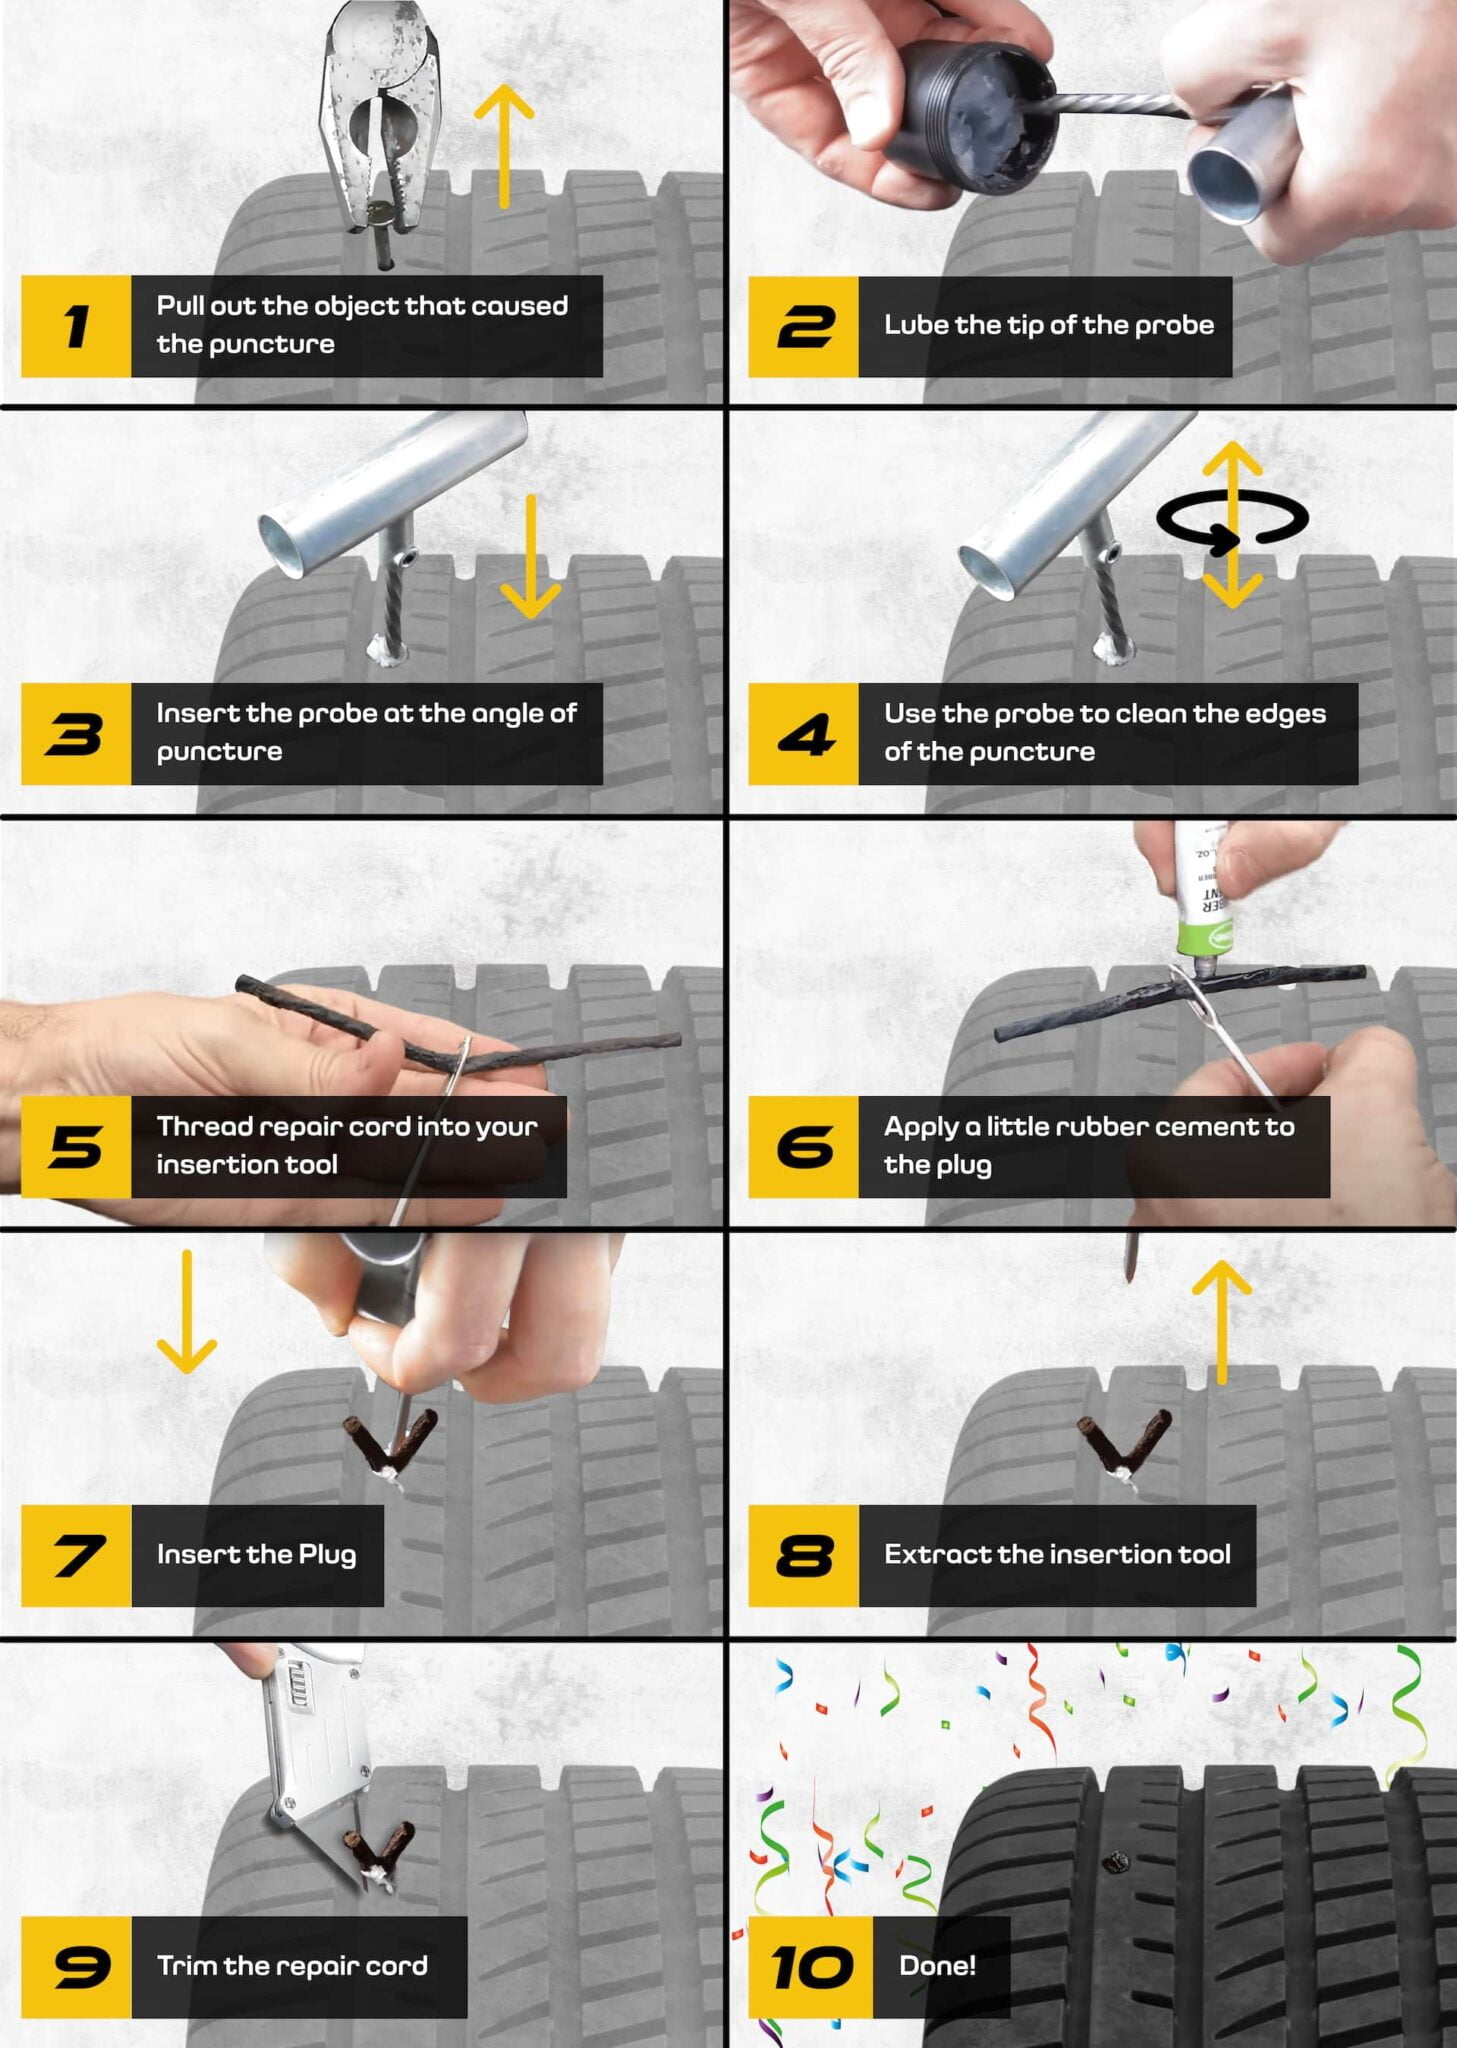
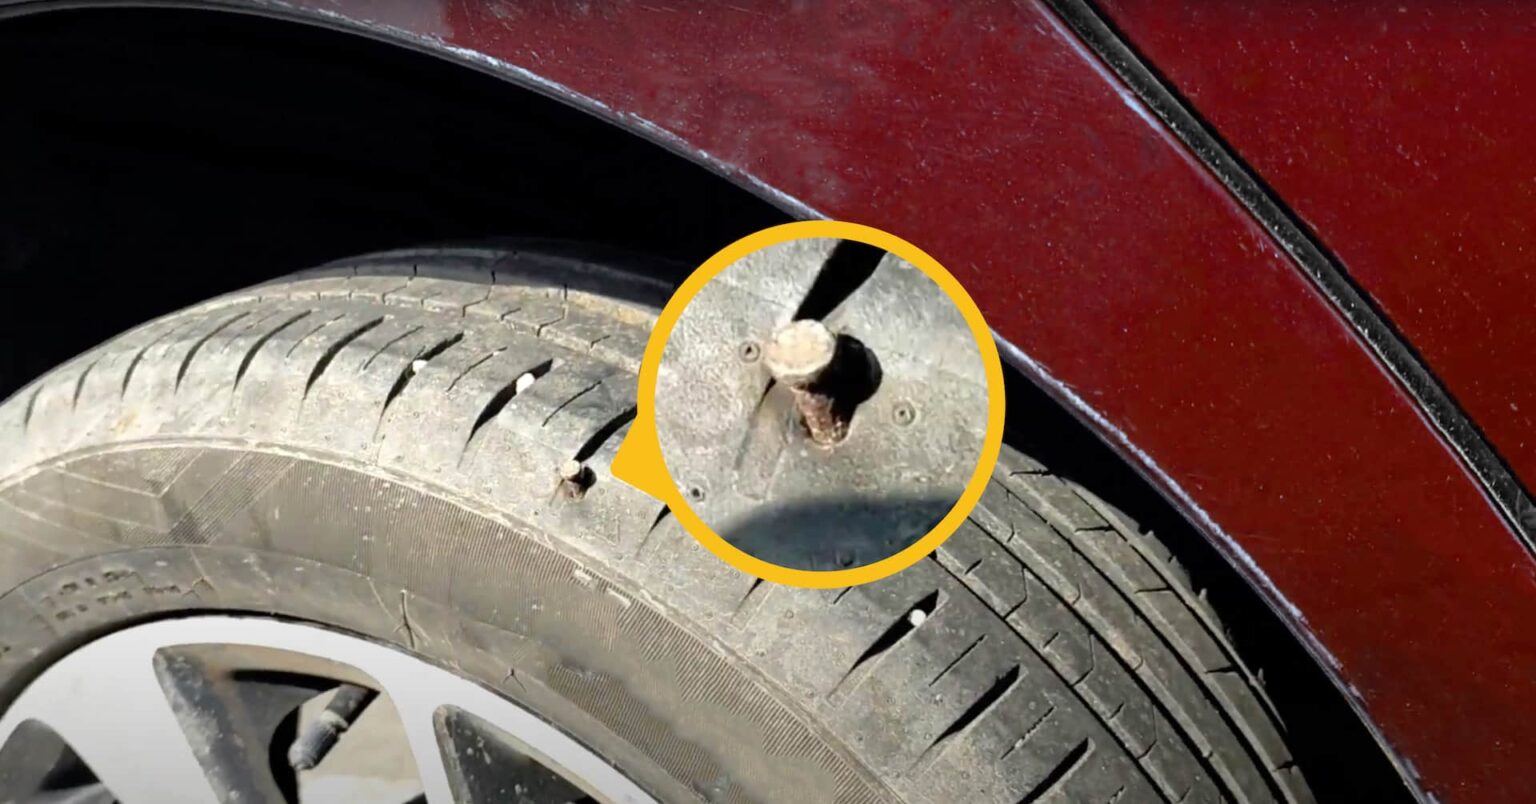
Pull out the object that caused the puncture
To begin the process of tire repair, the first step is to locate and remove the object that caused the puncture.
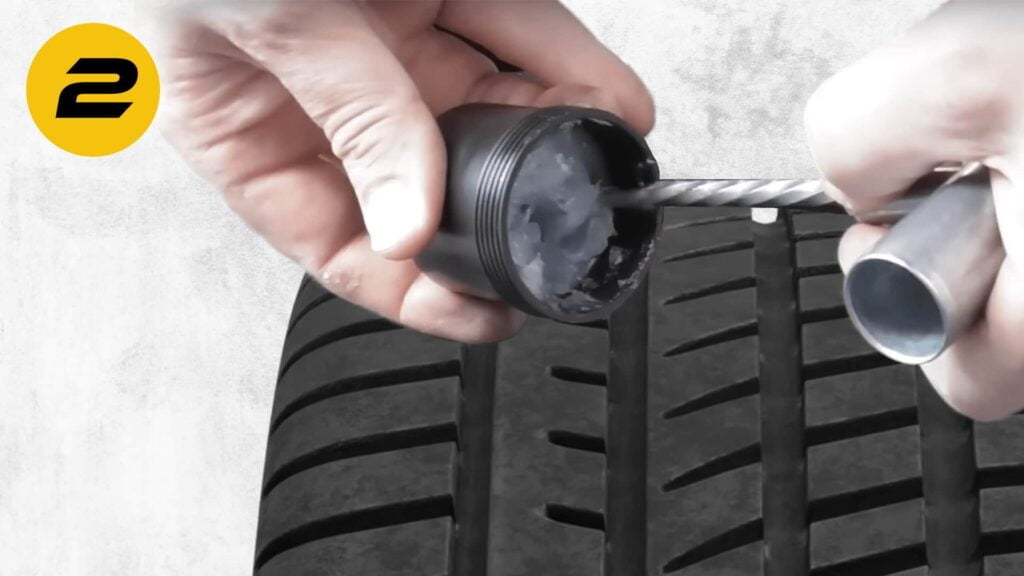
Lube the tip of the probe
The next step is to lubricate the tip of your probe. This helps ensure that your probe glides smoothly as it enters and exits the tire, reducing potential damage to the rubber or tube.
It is recommended to use a high-quality lubricant for this step, such as silicone oil or graphite powder, as this will help limit grinding between the metal and rubber.
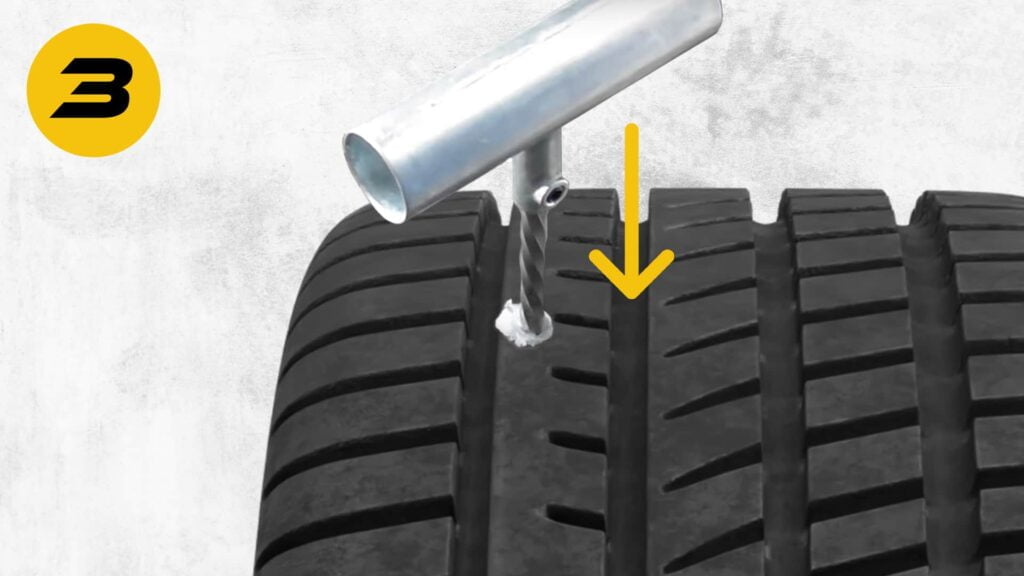
Insert the probe at the angle of the puncture to clean the edges
Once you have applied a generous amount of lubricant, carefully insert the probe into the area of the puncture at an angle.
By angling your probe correctly, you can clean away any debris stuck around and inside of the hole with minimal pressure.
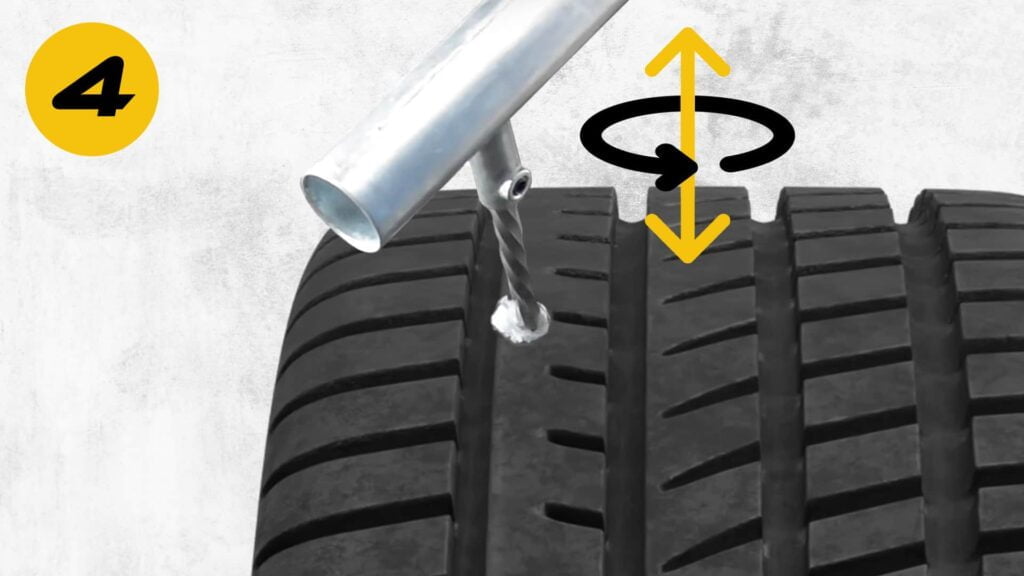
Use the probe to spread the puncture
Now, you can use the probe to spread the puncture. This step is done by slowly moving your probe in a circular motion around the punctured area until it increases slightly in size.
This should give you a good opening that is wide enough for your repair cord. You want to make sure that no irregular edges or points remain around the hole, as this could later cause potential air leakage due to weak sealing of the plug.
Be careful not to spread too much or make large movements with your probe as this could weaken the tire and increase risks of further damage down the line.
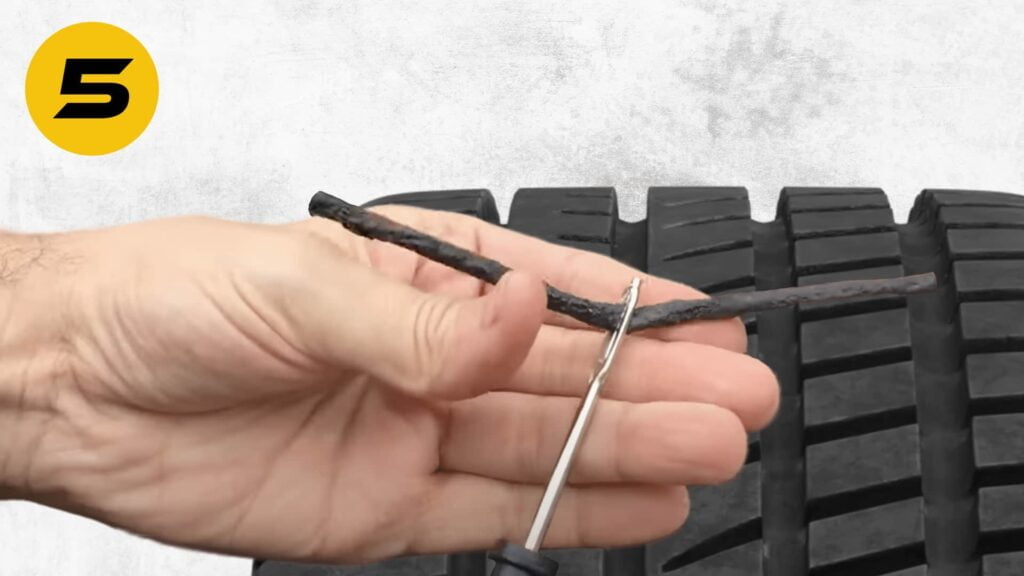
Thread the repair cord into your insertion tool
Thread the repair cord into your insertion tool.
Threading the sticky cork tire repair plug is not easy, but if you can get it squished into the hole, you should be able to pull it on through. The side cutters might help.
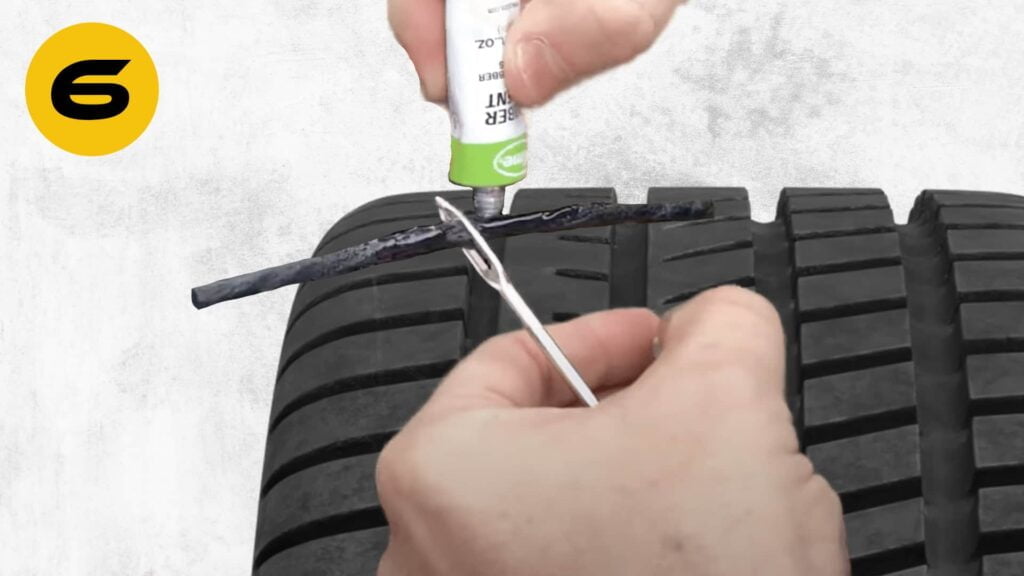
Apply a little rubber cement to the plug
Once you have carefully threaded the repair cord into the puncture, it is time to apply a little rubber cement to the plug.
This helps ensure that the repair cord stays secure and forms a tight seal with the tire.
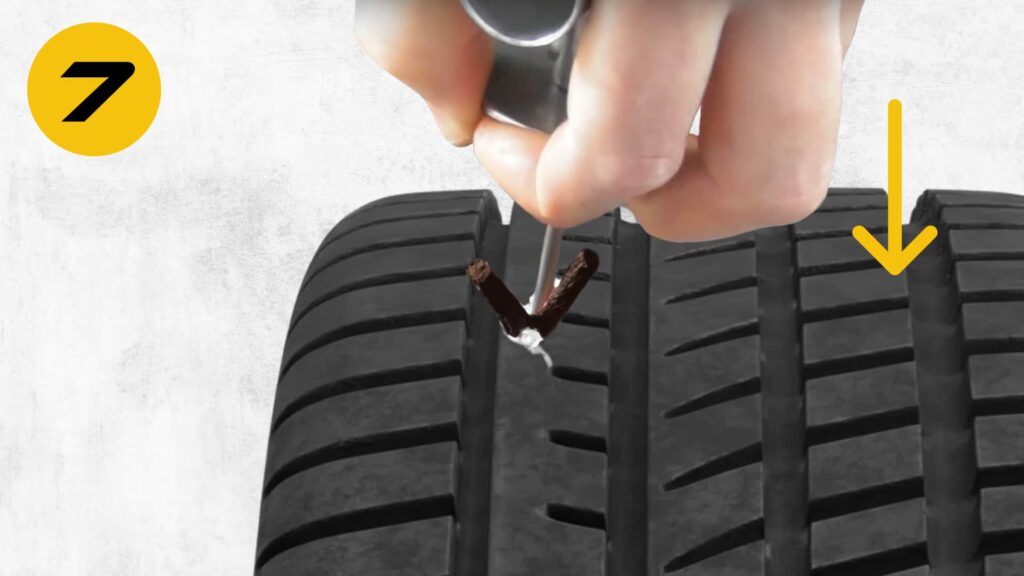
Insert the Plug
After applying the rubber cement to the plug, you can now insert it into your tire. Start by pressing the plug firmly into the puncture and ensure that it covers the entire area.
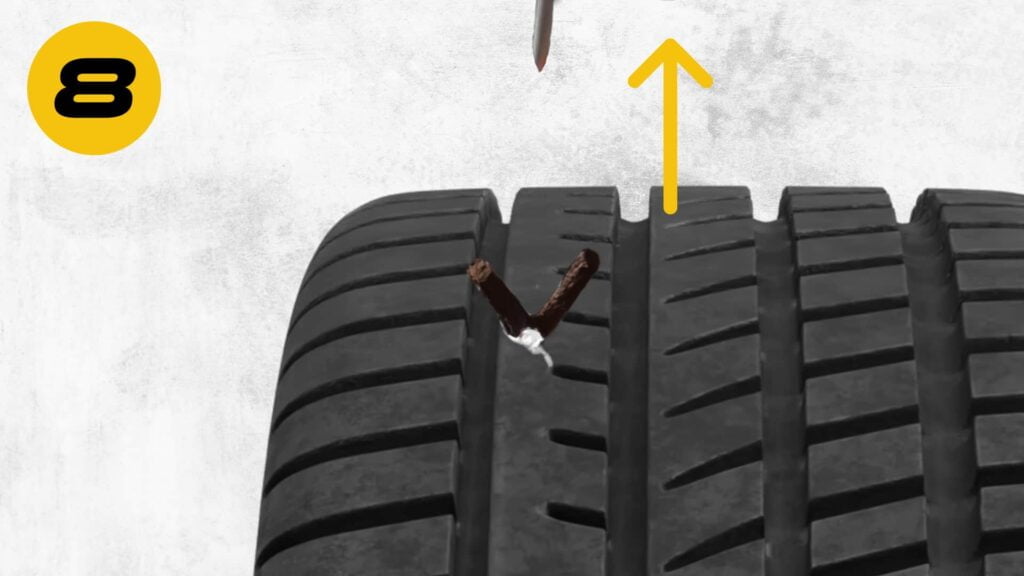
Extract the insertion tool
After securely inserting the plug, it is time to extract the insertion tool. Slowly and carefully pull out the tool, taking care not to tear or damage the repair cord.
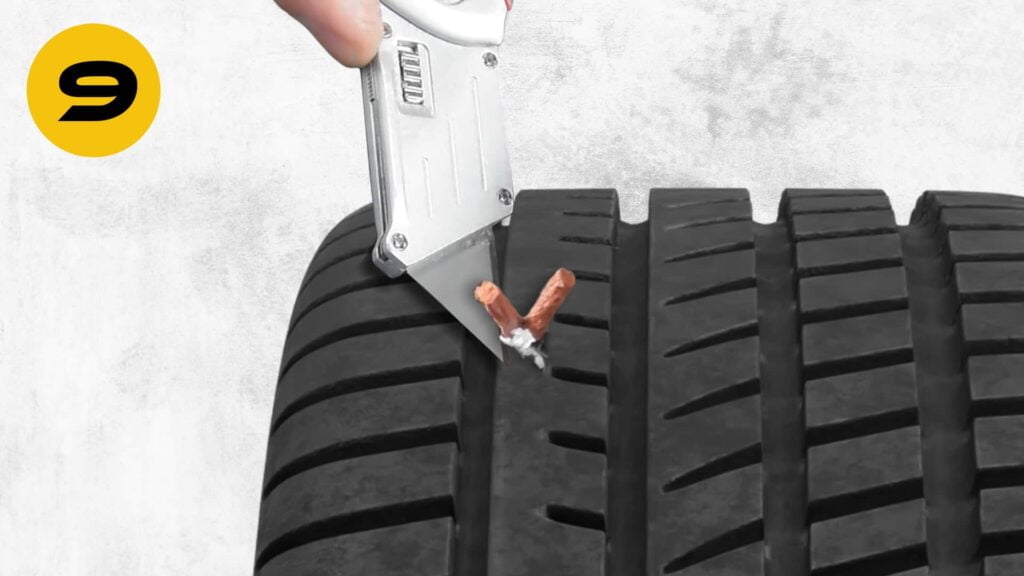
Trim the repair cord
Now that the plug is secured in place, use a pair of scissors or a sharp blade to trim off any excess repair cord.
Make sure to cut it flush with the surface of the tire and keep any frayed edges away from meeting the edge of the plug.

Done!
Congratulations! You’ve successfully repaired your tire using a tire repair kit. You can now breathe a sigh of relief knowing that you don’t have to worry about replacing your tire or getting stuck on the side of the road.
How to Use a Tire Repair Kit: Video Instructions
Tire Repair Kit Price
Where To Buy Tire Repair Kit
Tire Plug Strip Vs Mushroom Plug Puncture Repair Kits
Safety Precautions For Using A Tire Repair Kit
When To Replace A Damaged Tire Instead Of Repairing It
Alternatives To Tire Repair Kits
Run-flat Tires
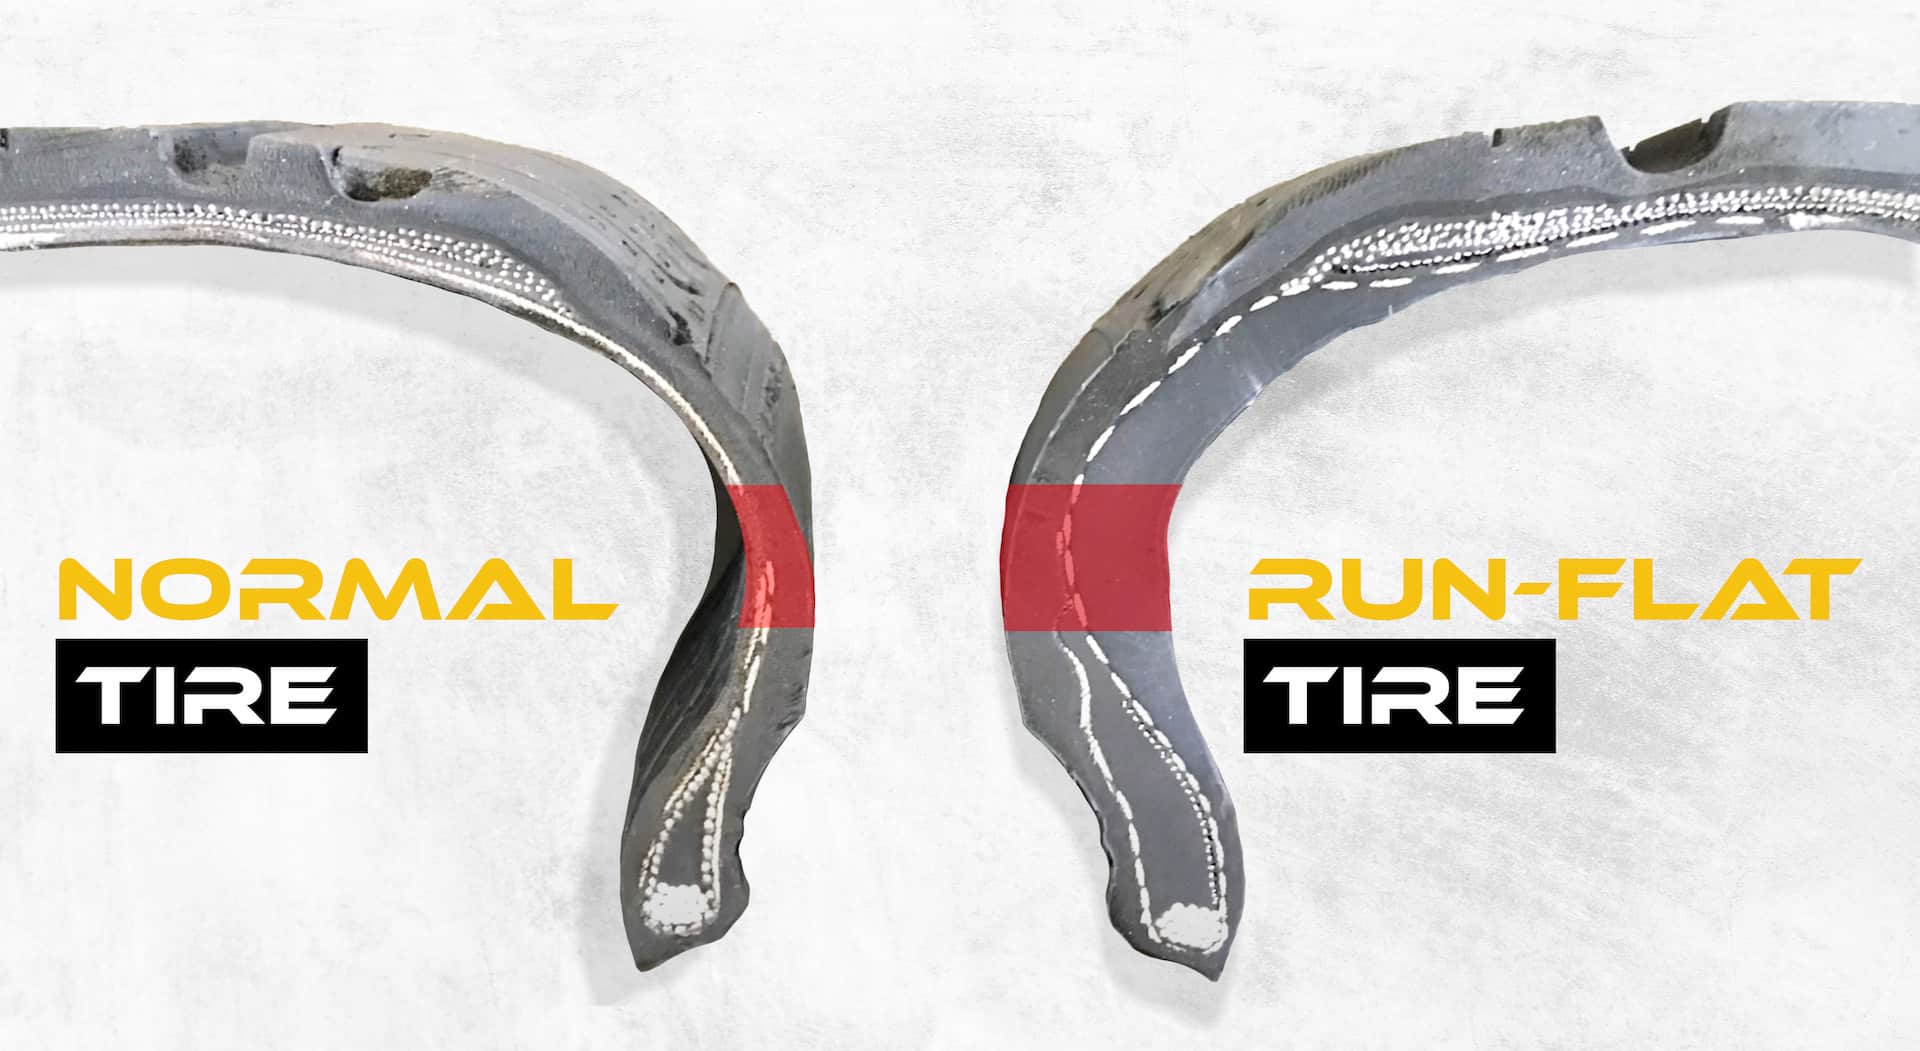
Run-flat tires are an alternative to tire repair kits. These tires are designed to allow drivers to continue driving on a flat tire for a short distance (typically 50 miles) at reduced speed.
Run-flat tires work by incorporating rigid sidewalls or reinforced beads that provide support even when the tire has lost air pressure.
Self-sealing Tires
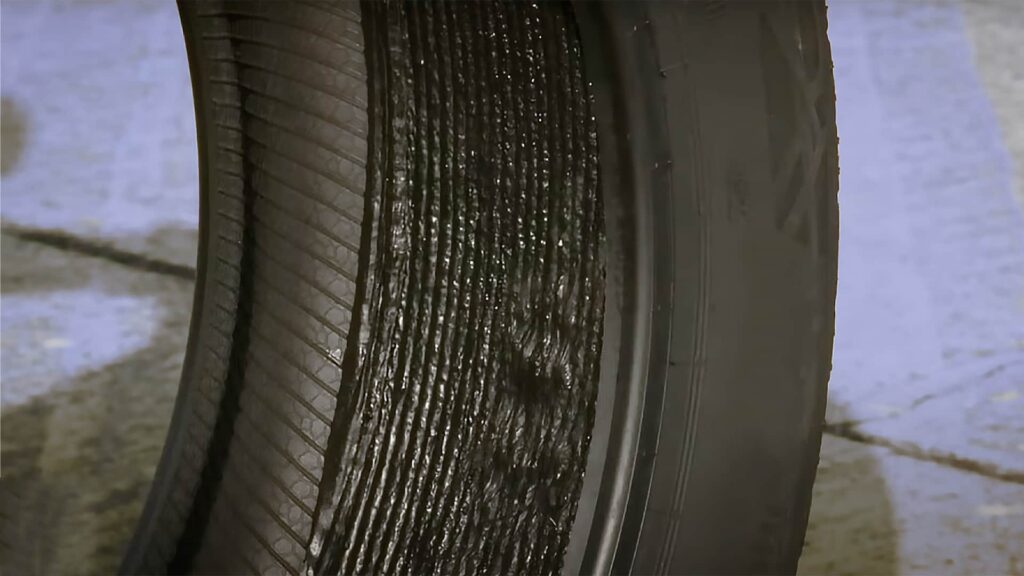
Self-sealing tires are an alternative to traditional tire repair kits. They work by having a sealant layer built into the tire that can automatically plug small punctures, such as those caused by nails or screws.
Some popular self-sealing technologies include Michelin SelfSeal and Goodyear Assurance WeatherReady. However, it’s important to note that self-sealing tires may not be able to repair larger punctures or cuts.
FAQs
Can A Tire Be Repaired If The Puncture Is On The Sidewall?
Unfortunately, if the puncture is on the sidewall of your tire, it cannot be repaired. The reason for this is because the sidewall does not have the same structure and support as other parts of the tire. If you attempt to repair a sidewall puncture, it can result in further damage or even a blowout while driving. This is why professional mechanics will always advise against repairing a sidewall puncture.
Is It Safe To Repair A Tire Yourself Or Should It Be Done By A Professional?
Repairing a tire yourself can save you money, but it’s important to know the risks involved. A plug-only repair is an unsafe method for repairing a tire and can lead to further damage or even a blowout while driving.
If you do decide to repair a tire yourself, make sure you follow all safety precautions provided with your kit and practice using the kit before experiencing an actual emergency.
Also, keep in mind that plugging a tire is considered as a temporary fix until it can be inspected and repaired properly by professionals.
Final Words
In conclusion, a tire repair kit is an essential tool to have on hand for any driver. With a little preparation and practice, you can easily repair small punctures in your tires and get back on the road quickly. Not only can using a tire repair kit save you time and hassle by avoiding a trip to the mechanic or tire shop, but it can also save you money by extending the life of your tires.
Remember to follow safety precautions, check your kit regularly for completeness, and know when it’s time to replace a damaged tire instead of repairing it. Don’t let a flat tire ruin your day – grab a tire repair kit and hit the road with confidence!
